
-5

-4

-3

-2

-1

default

+1

+2

+3

+4

+5
For some time I have talked about modifying the GS400's Picture Adjustment settings to get the most out of the camera, or to get a more film-like image. Finally, I took the time to put together some images to help you (and me) to better understand what these settings do, and better ways to use them.
Back in December, after informal testing, I cranked all of these settings all the way down. On my vacation, I shot a number of projects while in this mode: a music video, a feature length narrative film, and a feature length documentary. Only the music video has thus far been edited (the other footage has been reviewed numerous times). The results were pleasing to me.
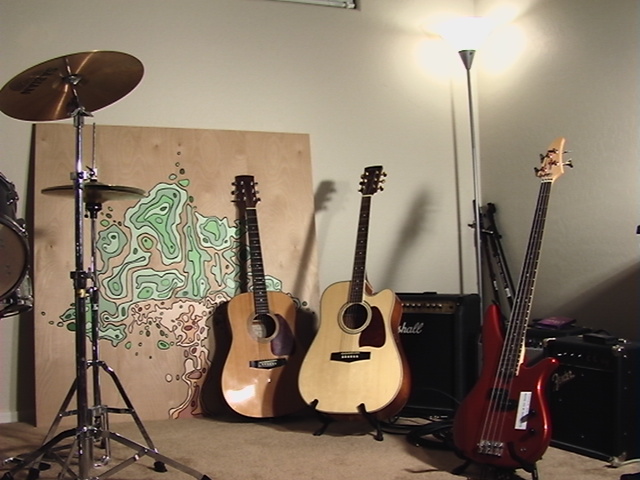
On to these tests: I took the pictures in still photo mode, because it would be much easier to get the pictures together compared to capturing and trying to pull stills out of DV footage. Fortunately, all the same manual controls and picture adjustment settings apply when in photo mode. I set up the scene, stationed the camera, and turned on about 1000 watts of tungsten light. I put the camera in Auto mode and allowed it to adjust the exposure of the scene. I flipped into manual mode, locked the exposure, and adjusted focus around the soundhole of the middle guitar. I manually adjusted the white balance to a white card.
I started with all Picture Adjustment settings at the default and went down the list one at a time, taking a snapshot for each of all eleven possible settings (from -5 to the default to +5) for each of Sharpness, Color, Exposure, and Contrast. Finally, I took a few snapshots that reflect extreme combinations of settings.
In order to make the image sharper, the camera performs "edge detection" in an attempt to find the edges of objects that need to be sharpened. Where it find edges it creates a small ring around the egde, darkening the dark side of the edge, and lightening the light side of the edge.
Mosquito noise is an artifact of sharpening in high detail areas. Where there is high detail, the camera detects many edges, close together, and attempts to sharpen them all using its normal method. The details and their sharpening begin to comete with one another, and the result is mosquito noise. To complicate the situation, if there is any movement in the high detail object, the effect of the sharpening can vary greatly from one frame to the next, causing not just distortion, but changing distortion each frame, causing more noise.
The sharpening has other consequences as well. The resulting sharp image has far more detail and complexity than the original image. All of this detail must be DCT encoded into the 25Mbps DV bitstream. The additional detail robs bits from the overall quality of the image. In the case of these stills, there is no limit on the bitstream, but you can examine file sizes and see that the higher sharpened images are larger than the lower sharpened images.
Another side effect that I observed is that the sharpening actually makes out-of-focus objects appear to be more in focus. In fact, the whole frame takes on the feeling of sharp focus, not just the objects at the desired focus distance. So, sharpening can exaserbate the already deep depth of field of a small-CCD camera such as the GS400.
Obviously, all this sharpening is a distortion of reality. No such sharpening process occurs as film emulsion is exposed. However, film has the advantage of having a very high "resolution" compared to DV, so it is sharper than DV, even without all this processing.
With sharpening all the way down, the image is a little soft, but shows almost no ringing or other artifacts. Compare this to sharpening all the way up, in which there are visible halos around all of the objects and many parts of the objects that aren't even really edges.
My recommendation is to avoid anything more than the default setting. At least two or three levels down is still rather sharp, but with fewer aparant artifacts. So how far down you can go and still get an image that is pleasing to you. What looks natural to you?
From all the way down, to all the way up...
-5
-4
-3
-2
-1
default
+1
+2
+3
+4
+5
The Color Picture Adjustment would seem to be a saturation control. This is a rather simple setting, and can be used as a creative decision, depending on the project you are working on. To my eyes, the default is slightly oversaturated. A setting of -2 or -3 looks to be natural, or what the actual scene looked like in the room. You'll have to trust me, I have no way of giving you a control image to compare to (I thought of taking a picture with a film camera, but the lab messes with saturation, contrast, exposure, etc. anyway, so I doubt it would be an accurate reflection, either). I had been using this all the way down for some time, and it seems in these tests that setting may be overly desaturated.
From all the way down, to all the way up...
-5

-4

-3

-2

-1

default

+1

+2

+3
+4

+5
The Exposure Picture Adjustment does not seem to function, in my tests. Take a look for yourself, but I took these images into Photoshop and it seems they are all identical. I thought perhaps Exposure didn't apply in Photo mode, so I tried changing it in Video mode, but I saw no effect. Am I doing something wrong?
From all the way down, to all the way up...

-5

-4

-3

-2

-1

default

+1

+2

+3

+4

+5
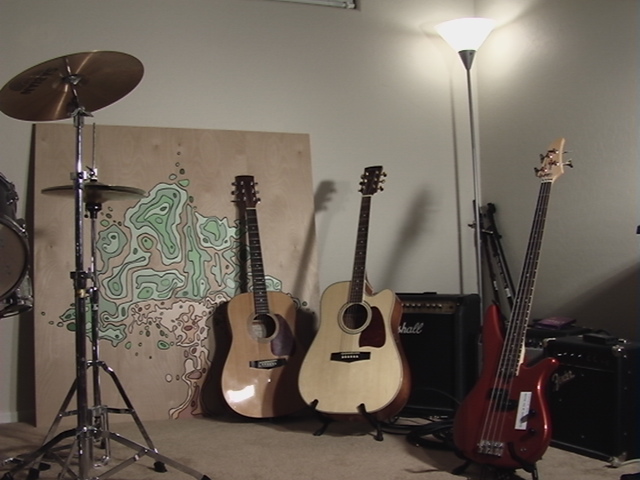
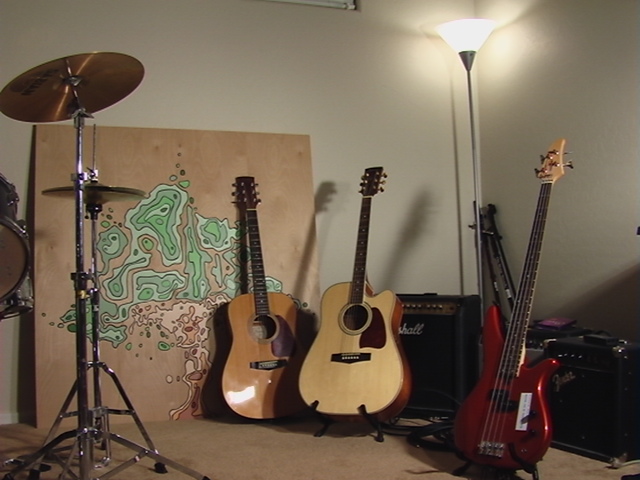
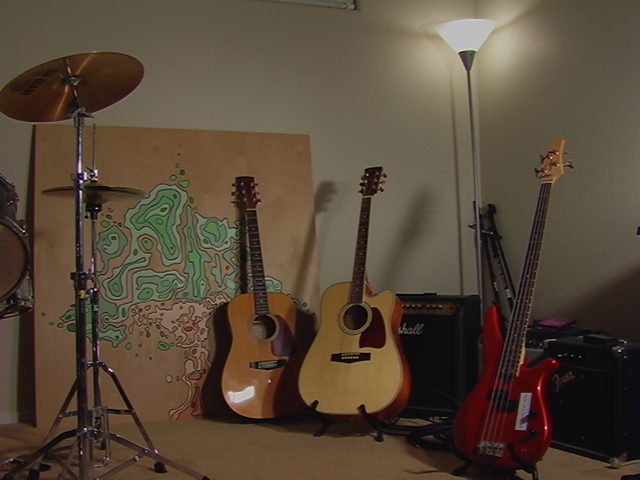
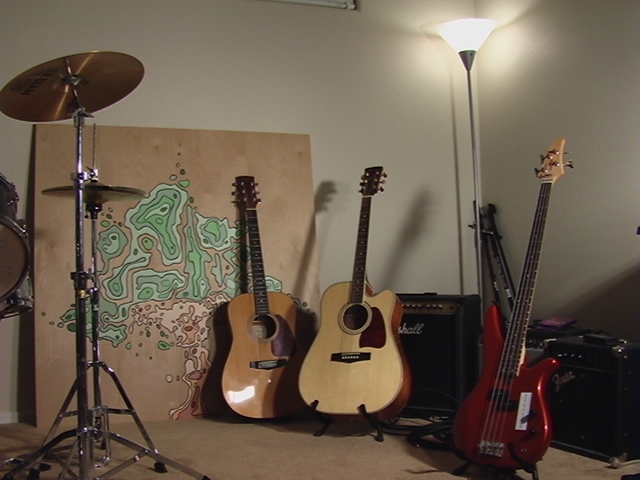
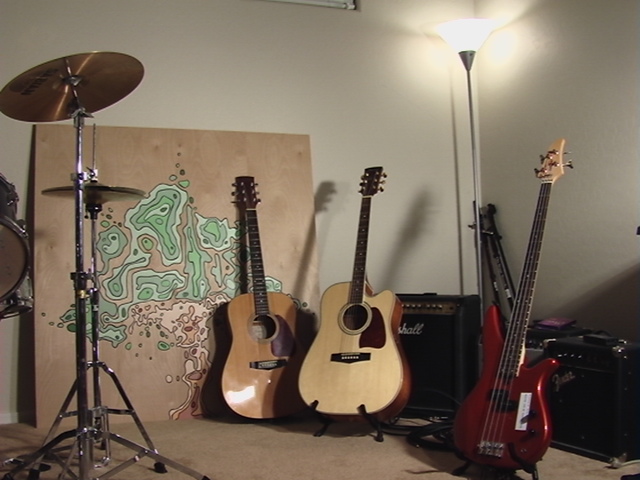
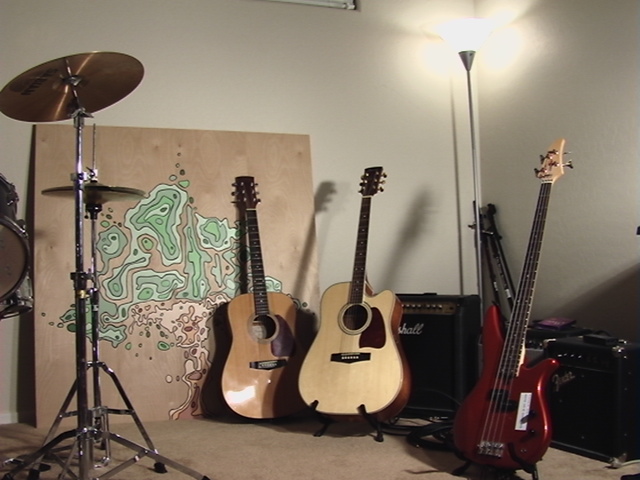
The Contrast Picture Adjustment is probably the best setting to adjust to get more out of your camera. You have probably read that DV cameras have very limited "exposure latitude" compared to film cameras. This basically means that in a typical scene where film will capture detail far into bright highlights and dark shadows, DV cameras will expose much of the highlights to absolute white and much of the shadows to absolute black, forever losing all of the detail.
Now, even without changing settings there are some ways around this you should know about. For instance, you can adjust the iris so you get the highlight detail you need, and then bring in extra lights into the shadows until you get the detail you need there. However, this is not always practical, and the exposure latitude is limited enough that there are situations where you couldn't possibly get enough light or light the scene properly.
The good news is that with the Contrast Picture Adjustment, you can get lots of exposure latitude that you are missing if you use the default setting. Turn it all the way down and you can get at least a couple stops additional latitude, maybe more.
Check out the images. At the default setting, the camera exposed such that the lamp was overexposed, going to absolute white. As you adjust the Contrast down, you can see the zebra stripes go away and detail restored to the highlights. Meanwhile, you get all the same detail in the shadows, and overall a richer, more even picture, a lot less "video-like." Now, the lamp is brough all the way down from extreme highlights to upper-midtones. I could have opened the iris of the camera up from the auto-exposure of F2.8 all the way to full OPEN, nearly two stops, and still not see zebra stripes. I would still have highlight detail, but I would have much more shadow detail as well. Amazing! This is probably the most profound change you can make.
From all the way down, to all the way up...
-5

-4
-3

-2
-1

default

+1
+2

+3
+4

+5
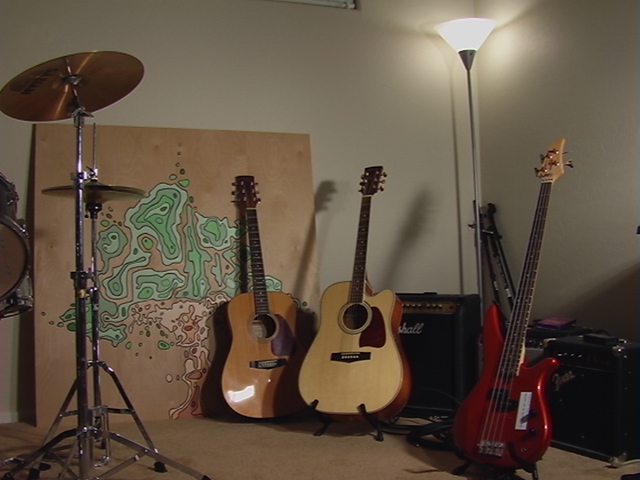
Here is an image with all settings all the way down, and all settings all the way up, just to show the range of adjustment that can be made.
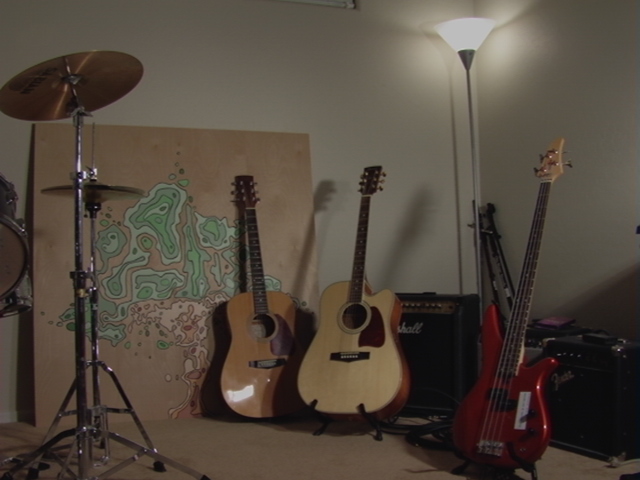
To my eyes, the most natural image is with Sharpness down 3-5 notches, Color down 2-3 notches, and Contrast 5 notches down. Few artifacts, great tonal range, and it doesn't scream VIDEO!